
Qualtrics
Step-by-step guide to send your event data from RudderStack to Qualtrics.
Qualtrics is a popular survey software that lets you create intelligent, real-time user surveys. It lets you get cutting-edge insights into your customers and use them to boost your brand value.
RudderStack lets you configure Qualtrics as a destination to which you can send your event data directly.
Getting Started
Before configuring Qualtrics as a destination in RudderStack, verify if Qualtrics supports the source platform you are sending the events from. Refer to the following table:
Connection Mode
Web
Mobile
Server
Device mode
Supported
Supported
-
Cloud mode
-
-
-
To know more about the difference between Cloud mode and Device mode in RudderStack, read the RudderStack connection modes guide.
Once you have confirmed that the source platform supports sending events to Qualtrics, follow these steps:
From your RudderStack dashboard, add the source and select Qualtrics from the list of destinations.
Configuration Settings
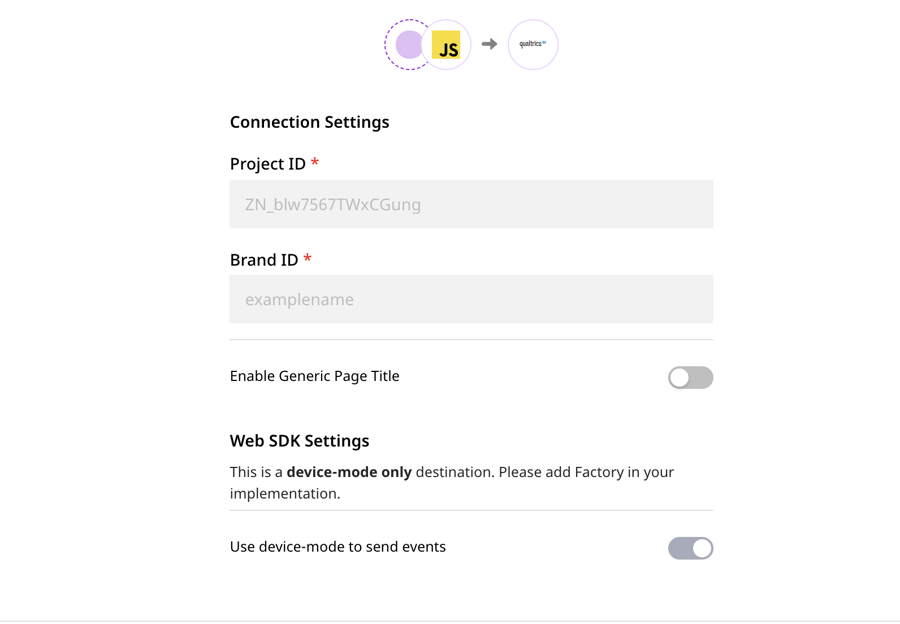
To successfully configure Qualtrics as a destination, you will need to configure the following settings:
Project ID: Enter your Qualtrics Project ID here.
Brand ID: Enter your Qualtrics Brand ID here.
Refer to the FAQ section below for steps on how to get your Qualtrics Project ID and Brand ID.
Enable Generic Page Title: If this field is enabled, RudderStack sends every
pagecall with the nameViewed a Page.
This field is useful only when using the page call.
If this option is disabled, RudderStack will search for the category and name of the page call and send the event as Viewed <category_field> <name_field> Page. If any of the two fields is absent, RudderStack sends the page call as Viewed <category_field>/<name_field> Page.
Adding device mode integration
iOS Android To add Qualtrics to your iOS project, follow these steps:
In your
Podfile, add theRudder-Qualtricsextension as shown:After adding the dependency followed by a
pod installcommand, add the following imports to yourAppDelegate.mfile:Then, add the initialization of your
RSClientas shown:Next, add the following snippet to display the qualified intercept on your
ViewController:
For more information, refer to the Qualtrics iOS documentation. Your Android project must be on version 5.0 (API level 21) or higher for RudderStack to be able to send events to Qualtrics.
Once confirmed, follow these steps to add Qualtrics to your Android project:
Open your
app/build.gradle(Module: app) file and add the following under thedependenciessection :Add a new Maven repository for the App Feedback package. Your
allprojectssection should appear as shown:Open the
AndroidManifest.xmlfile from thesrc/mainfolder in the project root and add the following XML snippet after the existing activity:Initialize the RudderStack SDK in your
Applicationclass'onCreate()method as shown:Add a
MyCallbacksubclass. You need to implement a callback for the Qualtrics APIs. This will be used to call thedisplayIntercept()method based on theevaluateIntercept()result. A good place to add this callback is before the last closing brace (}) in yourMainActivity.Javaclass. Add the following code:Add the following snippet to display the qualified intercept in your activity class:
For more information, refer to the Qualtrics Android documentation.
In the iOS Device Mode implementation, even if the user qualifies for multiple intercepts, only one will be shown. Whereas in Android, all the intercepts for the user will be shown.
Page
The page call lets you record your website's page views with any additional relevant information about the viewed page.
RudderStack passes any tracked events as embedded data to the Qualtrics intercept target. After the page call, the Qualtrics survey is loaded.
You can set the intercepts when a user creates the project or after they have created the project.
A sample page call is as shown:
For the above example, The event will be sent as Viewed category name Page, if the Generic Page Title option is disabled in the RudderStack dashboard. If this option is enabled, the event will be sent as Viewed a Page.
If the category field is not mentioned in the page call but specified inside the properties, RudderStack still includes the field while sending the event. For example, refer to the following snippet:
For the above example, the event will be sent as Viewed category name Page, if the Generic Page Title option is disabled in the RudderStack dashboard. If it is enabled, the event will be sent as Viewed a Page.
If category is not specified in the event at all, RudderStack sends the event with only the page name, as shown below:
For the above example, The event will be sent as Viewed name Page, if the Generic Page Title option is disabled in the RudderStack dashboard. If enabled, the event will be sent as Viewed a Page.
If both the name and category fields are absent in the page call and the Generic Page Title option is disabled, RudderStack will not send the event to Qualtrics.
Track
The track call lets you track how many times a user performs certain actions. RudderStack passes any tracked events as embedded data to the Qualtrics intercept target. After the track call, the Qualtrics survey is loaded.
At the destination end, i.e. Qualtrics, both page and track calls have the same functionality.
You can set the intercepts when a user creates the project or after they have created the project.
In this case, the value of event field of the track call will be used as the event name while sending it to Qualtrics.
A sample track call is as shown:
In the above example, the event will be sent to Qualtrics as Test Event.
Identify
The identify call is supported only in the mobile (Android and iOS) Device Mode integration.
When you make an identify call, RudderStack sets the user traits using:
The Qualtrics
Propertiesclass,setString, andsetNumberAPI in case of Android, andThe
setStringWithStringandsetNumberWithNumberAPI in case of iOS
These user traits can be used as custom properties while setting the Target Logic or Embedded Data for any intercept in your Qualtrics dashboard.
iOS Android
FAQ
How do I get my Project ID and Brand ID?
To get your Qualtrics Project ID and Brand ID, follow these steps:
Log into your Qualtrics account.
Click on the project you will be using.
Click on Settings tab, followed by Manage Project option (the right-most dropdown menu in the dashboard).
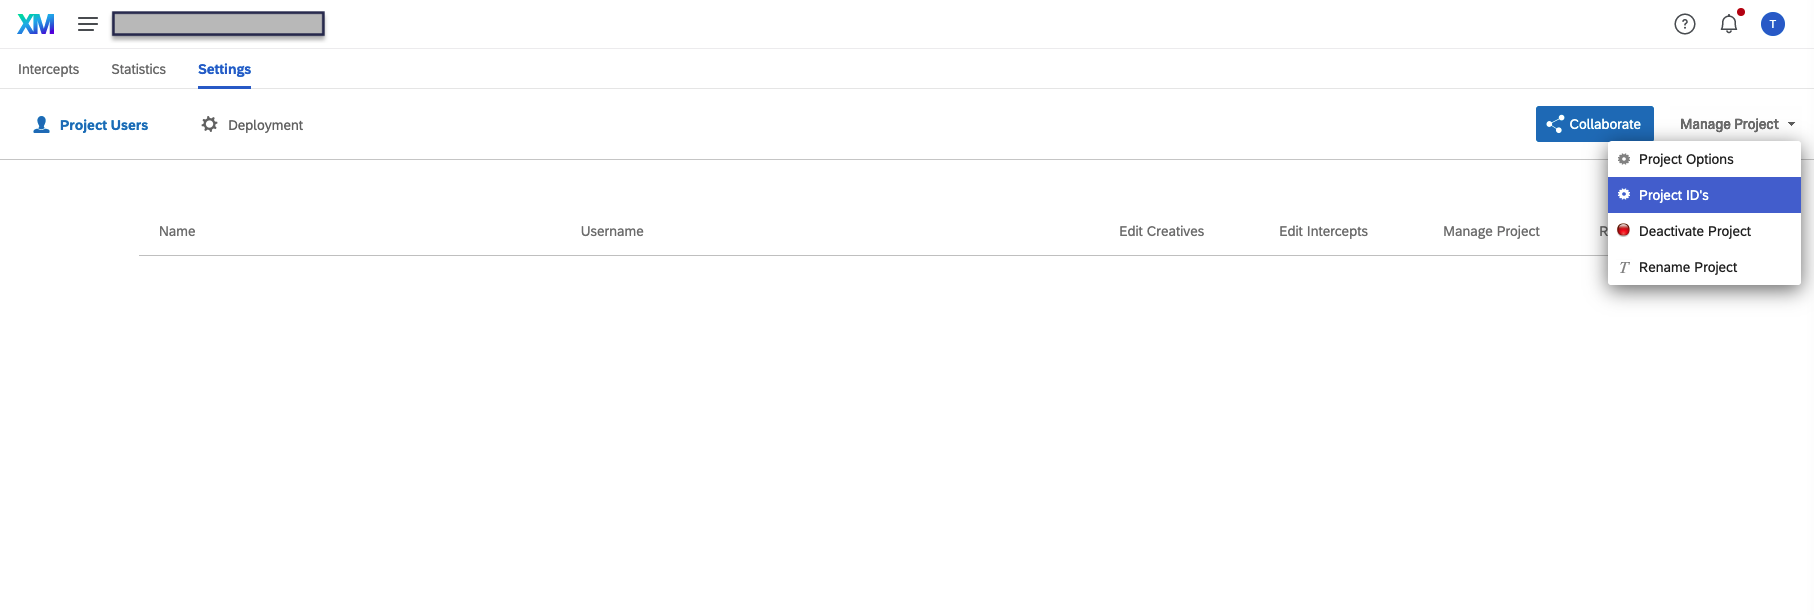
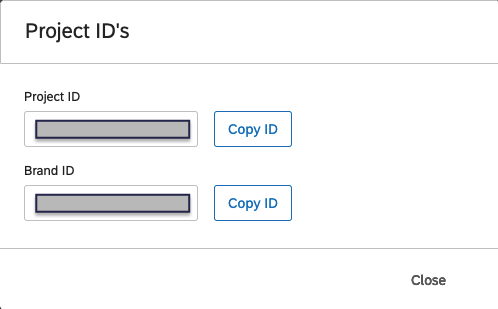
Click on Project ID's. Here you will find both your Project ID and Brand ID, as shown:
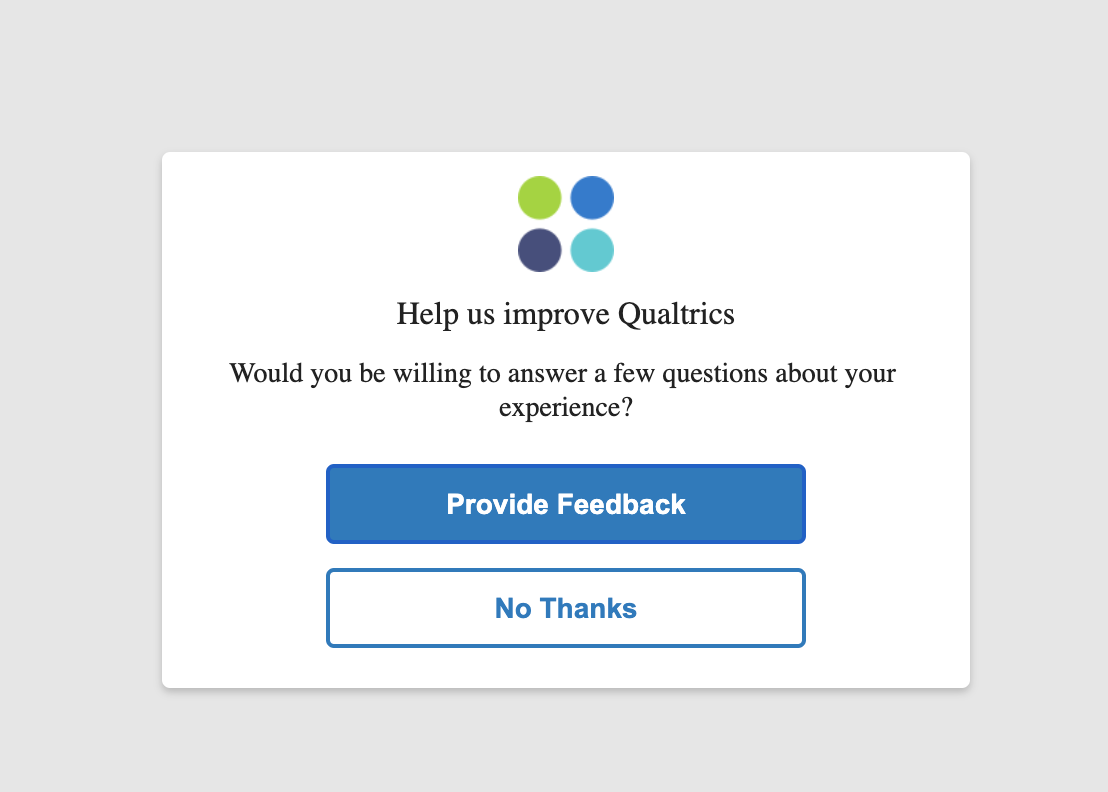
How do I know if the SDK has loaded successfully?
Once RudderStack loads the web SDK successfully, you will be able to see the survey options chosen in the Qualtrics dashboard, e.g., a survey button, survey form, etc.
An example is shown below:
In the mobile Device Mode integration, is it possible to manually set the logic?
Yes, you can manually set the logic using Qualtrics Properties class setString and setNumber API on Android and setStringWithString and setNumberWithNumber API on iOS. For more information, refer to the iOS documentation or the Android documentation, depending on your implementation.
Contact Us
For questions on any of the sections covered in this guide, feel free to contact us or start a conversation in our Slack community.
Last updated
Was this helpful?